Showing posts with label ruby. Show all posts

Monday, December 30, 2013

Beautifying personal & professional public links using your own domain

In an attempt to make links to my public persona A) easier to remember and B) easier to share, I cooked up a 25 line Sinatra app that can be used to do just this. I love Sinatra since the DSL makes writing simple apps like these so easy.

You can find the code here on github.

I hosted the app on a digital ocean instance and cooked up these links:

Saturday, August 24, 2013

Formatting code blocks from Kindle

I was ramping up on android using a Kindle book and realized Kindle for Mac app does a terrible job of copy/pasting contents to an IDE/text editor. I created a simple ruby script which tries to properly format code blocks copied from the Kindle app and then replaces the contents of your clipboard with *somewhat* better formatted code. Not perfect by any means, but made my life a little easier. 
 
Before:


After:


Check it out on github -> here <-

Saturday, May 4, 2013

Mining geo data from Twitter's API


Hot off the press, a script that is able to gather large-ish amounts of geo tagged tweet data from Twitter's public API. Running for 24 hours will yield ~300MB (~6 Million Tweets) in the following format

timestamp    tweet_id           tweet_language    country    lat        lng
1367706951 330813049193762816 es ES 39.4643 -0.3548

For more details check out: twitter-geo-data on github.

Tuesday, February 5, 2013

Multi-threading in JRuby

The traditional Ruby you might be used to running (along with other interpreted languages such as python) make use of a global interpreter lock which ensures that only one thread can interpret code at any given time. In Ruby 1.8, the process is only allocated one OS thread meaning any attempts at parallelism are basically useless. In Ruby 1.9 things were improved slightly; the GIL still only runs on one thread, but the process can take advantage of multiple threads. This means that anything I/O bound can run concurrently (database queries, network requests) but you won't be able to make effective use of the processing power of all of your cores.

JRuby on the other hand, is built upon the JVM. One can make use of "true" native threads which are able to run concurrently with you parent thread.

To visualize how this works check out this diagram:


Read more about the GIL here (from which I borrowed the above diagram).

Setup

Here are some quick instructions on how to setup JRuby on your machine so we can test out multi-threaded performance. The easiest way to install JRuby in my opinion is through Ruby Version Manager. RVM is essentially an easy way to manage multiple ruby versions (and their associated gems) on a single machine. For Linux/Unix/OSX instructions, see here. For windows go here.

1- Install JRuby:

>rvm install jruby

2- Check that it's installed

> rvm list gemsets


3- rvm use <name of the jruby gemset>
> rvm use jruby-1.7.1

4- Test it out in irb (ruby's interactive console). You should see "java" as the
RUBY_PLATFORM if things are installed properly:


Sample App

The following are two sample apps which showcase multi-threading in JRuby vs. Ruby 1.9 vs Ruby Enterprise Edition 1.8.7.

JRuby Example (also showcasing how easy it is to call java code from Ruby):

Standard Ruby example:
To run the experiment:
1- Run in Jruby:
> ruby multi_thread_jruby.rb

2- Run in Ruby 1.9.3
> rvm install ruby-1.9.3-p286
> rvm use ruby-1.9.3-p286
> ruby multi_thread_ruby.rb

3- Run in Ruby 1.8.7
> rvm install ree-1.8.7-2012.02
> rvm use ree-1.8.7-2012.02
> ruby multi_thread_ruby.rb

Average completion time summary:
JRuby(1.7.1):            199.3ms
Ruby(1.9.3p286):         610.0ms
Ruby(ree-1.8.7-2012.02): 748.6ms

As we can see, JRuby is close to 4 times faster than Ruby 1.8 on my 4 core MacBook Air. Ruby 1.9 performs slightly better by being able to take advantage of time during which the process is I/O blocked. Overall, JRuby is the clear choice for maximizing multi-threaded performance.

Additional Reading: 


More on calling Java from JRuby:
https://github.com/jruby/jruby/wiki/CallingJavaFromJRuby

An interesting look at benchmarks of JRuby compared to other ruby versions. This shows that JRuby is not better in all scenarios: 
http://etehtsea.me/the-great-ruby-shootout

#SeekDiversePerspectives

Saturday, December 15, 2012

Push notification + Terminal = Win!

Developing with Pushover

I was compiling ruby on my new Raspberry Pi (a process that takes about 2 hours) and I thought to myself, wouldn't it be great if I had some way of knowing when it was done? Wouldn't it be even more awesome if I could get info about any task in my terminal completing wherever I was?

I decided to give Pushover (https://pushover.net/) a spin during a late night hacking session. Pushover is essentially a (paid) app that allows you to receive push notifications on your phone through their simple API.

I was quickly able to hack together a bash/ruby function that I think will be pretty useful for me given how much time I spend in the terminal.

usage example: 
>sleep 2 ; notify "I slept for 2 seconds and woke up!"

The result (after ~2 seconds):

One could easily imagine kicking off a sereis of lengthy operations in the terminal, interspersing a couple of calls to notify, then going for a coffee until your phone says its all over. 
Ex: ./build_code.sh ; notify "Build complete" ; ./deploy_to_server ; notify "deploy complete, come back!" 

If this sounds interesting, follow the steps below to get setup:

1- First, you'll need to get the Pushover app for iOS or Android. It's not free, so you'l need to deal with that. Once you've download the app, create an account on your phone.

2- Go to their site(https://pushover.net/) and login. Once logged in, you'll see your user key in the dashboard. Note that down. 
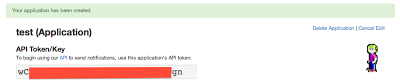
3- You should have the option of creating a new application. Go through their application creation flow
4- Once you create the application, you'll get an application API token:
5- The last step is to add the following code to the end of your ~/.bashrc (or ~/.zshrc if you like to live on the edge). NOTE: replace application token with data from #4 and user key with data from #2.

Thats it! Now go kick off a build and wait for a pleasant ring to bring you back.